25 Jul

Android NDK and SDL_RWops

Note: There’s now a patch for SDL that makes the same possible on older Androids as well.

The Android NDK makes it possible to use SDL to code Android apps. The aliens.c example bundled with the Android SDL port is fine and dandy except it reads data from /sdcard/data and it has to be pushed manually on the device. A nicer approach is to use the standard SDL way to load data from weird sources: with the SDL_RWops struct. We can use the Android AssetManager object to read data from the APK file (the assets directory in the project), Android 2.3 comes with <android/asset_manager.h> that has the needed helper NDK stuff.

Now, the SDL example is for Android 1.5 (or 1.6, I forget) which means it doesn’t use NativeActivity but instead rolls its own Java wrapper. That means we don’t have simple access to the asset manager — NativeActivity makes this easy because it calls the native code with all the useful stuff ready in a struct android_app — so we have to look it up ourselves.

In short:

  1. Get access to AAssetManager

    1. Using NativeActivity, it’s in struct android_app passed to android_main()

    2. If struct android_app is not available (as in the SDL example), store JNI environment in a global variable in the SDL startup code and use it in your code to get AssetManager

  2. Use AAsset_RWFromAsset() defined below to get an SDL_RWops to a file inside the assets directory

We have to modify the SDL startup method defined in the library source code:

SDL_android_main.cpp (line 19-ish)

JNIEnv *g_env;

extern "C" void Java_org_libsdl_app_SDLActivity_nativeInit(JNIEnv* env, jclass cls, jobject obj)
{
    // Store the environment for later use.
    g_env = env;

    /* This interface could expand with ABI negotiation, calbacks, etc. */
    SDL_Android_Init(env, cls);

    /* Run the application code! */
    int status;
    char *argv[2];
    argv[0] = strdup("SDL_app");
    argv[1] = NULL;
    status = SDL_main(1, argv);

    /* We exit here for consistency with other platforms. */
    exit(status);
}

main.c

Note: fatal() is a macro that invokes the Android logging interfaces, much like the LOGE() macro.

#include "android_rwops.h"
#include <android/asset_manager_jni.h>
#include <jni.h>

// g_env is set in SDL_android_main.cpp
extern JNIEnv *g_env;

// This function retrieves a static member of SDLActivity called mAssetMgr
// which is initialized in the onCreate() method like so:
// ...
//   mAssetMgr = getAssets();
// ...
// You can also call the getAssets() method from the native code.

AAssetManager * get_asset_manager()
{
	jclass sdlClass = (*g_env)->FindClass(g_env, "org/libsdl/app/SDLActivity");

	if (sdlClass == 0)
	{
		fatal("org/libsdl/app/SDLActivity not found.");
		return NULL;
	}

	jfieldID assman = (*g_env)->GetStaticFieldID(g_env, sdlClass, 
                          "mAssetMgr", "Landroid/content/res/AssetManager;");

	if (assman == 0)
	{
		fatal("Could not find mAssetMgr.");
		return NULL;
	}

	jobject assets = (*g_env)->GetStaticObjectField(g_env, sdlClass, assman);

	if (assets == 0)
	{
		fatal("Could not get mAssetMgr.");
		return NULL;
	}

	return AAssetManager_fromJava(g_env, assets);
}

int main(int argc, char **argv)
{
  AAssetManager *assets = get_asset_manager();

  // You should check the return value, here we assume logo.png is found
  SDL_RWops *rw = AAsset_RWFromAsset(assets, "image.bmp");

  // Do whatever you want with the rwops
  GfxSurface *i = SDL_LoadBMP_RW(rw, 1);

  ...
}

android_rwops.h

#pragma once

#ifdef _cplusplus
extern "C" {
#endif

#include "SDL_rwops.h"
#include <android/asset_manager.h>

SDL_RWops * AAsset_RWFromAsset(AAssetManager *mgr, const char *filename);

#ifdef _cplusplus
}
#endif

android_rwops.c

#include "android_rwops.h"

static SDLCALL long aa_rw_seek(struct SDL_RWops * ops, long offset, int whence)
{
	return AAsset_seek((AAsset*)ops->hidden.unknown.data1, offset, whence);
}


static SDLCALL size_t aa_rw_read(struct SDL_RWops * ops, void *ptr, size_t size, size_t maxnum)
{
	return AAsset_read((AAsset*)ops->hidden.unknown.data1, ptr, maxnum * size) / size;
}


static SDLCALL int aa_rw_close(struct SDL_RWops * ops)
{
	AAsset_close((AAsset*)ops->hidden.unknown.data1);
	SDL_FreeRW(ops);

	return 0;
}


SDL_RWops * AAsset_RWFromAsset(AAssetManager *mgr, const char *filename)
{
	AAsset *asset = AAssetManager_open(mgr, filename, AASSET_MODE_RANDOM);

	if (!asset)
		return NULL;
	
	SDL_RWops *ops = SDL_AllocRW();
	
	if (!ops)
	{
		AAsset_close(asset);
		return NULL;
	}
	
	ops->hidden.unknown.data1 = asset;
	ops->read = aa_rw_read;
	ops->write = NULL;
	ops->seek = aa_rw_seek;
	ops->close = aa_rw_close;
	
	return ops;
}
31 Dec

Creating a Simple GUI from Scratch

Introduction

More often than not, the biggest obstacle for a programmer is adding a GUI to a otherwisely ready application. This probably is because you generally can create a program that inputs and outputs text with a few lines of code in any language. However, if you don’t count MessageBox() and other similar helper APIs that are available in most windowing systems and that are as simple to use as gets() and printf(), it’s a unnecessarily big step to change a command line program into a program that outputs the exact same text but with complex command line arguments replaced by a few buttons and a window with the outputted text.

However, if you are developing a program that already draws something on the screen, it’s really easy to add simple mouse interactivity. This is especially true if you are using SDL (even if it’s extremely bare bones in these things!) and already use SDL_rect (your standard rectangle) to draw things. You can simply change the draw routine so that it takes one more argument which would be the SDL_event struct you’re already using to check for a quit message and so on. Then for every object you are drawing on screen, check if the event if a mouse button down event and that the coordinates are inside the rectangle that will be drawn. This eliminates completely the need for having to plan a separate system that interprets the mouse events. It’s sort of piggybacking on the existing code with minimal changes to the existing code.

Now, you might already think that is way too simplistic and lazy but think again. Not many programs need a more complex GUI with multiple movable windows and so on. If you really do need that, then be my guest and create a exhaustive windowing system or take the time to learn an existing system. But it is still overhead and you have to do comparatively a lot of work before any real results. At least I hate that kind of mental overhead. And while this whole idea of combining the drawing and the event processing sounds like a bit of a hack, it really isn’t a “hack” as in patching something you will probably have to replace with a better solution later. It’s just a different way of doing almost the same thing. With less overhead.

I have used this approach in my latest project and from direct experience I know it is possible to create scrollbars, scrolling text fields, text input fields, message boxes and pretty much anything I have needed. And it’s not too much code either even if you have to create absolutely everything from nothing. In other words I do not feel limited or burdened.

How to do it

As explained above, you most likely are drawing to a specific region on the screen for every object you need to check for mouse clicks. It is not necessary to have any kind of array where those regions are. You need to make sure that for every mouse click event runs the draw loop once and that the mouse click event gets passed to the draw routine. Then check if the coordinates are inside the draw region.

This is where the part starts that it admittedly gets a bit hacky: if a button is pressed, the event that the button triggers will be run in the middle of the draw loop (unless you somehow buffer the events). In most cases this doesn’t matter at all but it could be that what is on the screen is not exactly how it really is; you might have two selected items for a duration of one frame and so on. For the most part this doesn’t matter since you are getting results with very little overhead.

Consider this example.

void draw_stuff()
{
  SDL_Rect position = {10, 10, 40, 40};

  SDL_BlitRect(button_gfx, NULL, screen, &position);
}

void draw_stuff_and_check_events(SDL_Event *event)
{
  SDL_Rect position = {10, 10, 40, 40};

  if (event->type == SDL_MOUSEBUTTONDOWN 
   && event->button.x >= position.x
   && event->button.y >= position.y  
   && event->button.x < position.x + position.w 
   && event->button.y < position.y + position.h)
     button_event();

  SDL_BlitRect(button_gfx, NULL, screen, &position);
}

void event_loop()
{
  SDL_Event event;

  while (SDL_PollEvent(&event))
  {
    if (event.type == SDL_QUIT) break;

    draw_stuff(&event);
  }
}

From the above example, the benefits of this approach are obvious. The event checking can simply be injected anywhere in the code as long as you have the event and a region.

Solutions to common problems

One downside in this is that if you draw multiple overlapping regions, the region drawn last will be the one that is visible on the screen but the click is handled by the first region. Our event checking sees the regions from the other side of the screen. In such cases you can first iterate the regions in reverse order checking the event and then draw them in the correct order. An example in the mentioned project is the menu, submenus often overlap the parent menu; I solved that by first going through the menus in the order the user sees them and then drawing them back to front.

Dragging items is easy: simply check for mouse motion events and if the button is held down and the mouse is moved, just adjust the position of the matching region. You do not need any special “drag starts now” and “drag ends now, update objects” phases. However, this simplistic method is subject to the previous issue if you move a region over one that seems to be under it. You can also simply record the clicked object when the mouse button is pressed and make the motion events match only the selected region.

FAQ

I absolutely need a separate window

This is possible as long as the window can be modal (like a message or open file dialog that takes over from the window behind it). You simply jump to another event loop until the new window is closed, much like it’s done in the Windows API with GetOpenFileName() or the MessageBox() mentioned earlier. Then it’s just a matter of drawing the new window and checking for the events normally.

Is this reusable?

Of course. You could create a small library that has basic functionality and helper functions. A practical example can be seen here.

Even if you can use the event checking straight in the source code, you can still define the regions in an array and link to relevant event handlers.

Conclusion

Combining the drawing and the event processing code can save time in the short term. Many common GUI elements are perfectly possible to replicate. The idea described above should be considered if a project needs mouse interaction and external libraries are not available, the conversion of existing code seems expensive or the learning curve is too steep compared to the future benefits. Nonetheless, in borderline cases, it can be well worth prototyping due to the minimal overhead and developing considerations.

22 Sep

Introducing My Latest Projects

… Or, How to Procrastinate Productively.

klystrack3

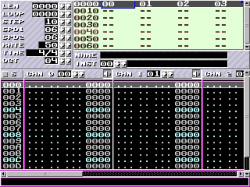
I decided to make one of my current projects open source and post them on Google Code just for fun. The project is a tool chain that I’m using to remake Thrust. In reality, I decided to divide the project into two separate projects: the actual game engine (called klystron) and related tools, and a music editor that uses the engine.

Here are two videos I made a while ago that demonstrate the engine. The first is the music editor (called klystrack) — it’s much less ugly at the moment but the sound synthesis is the same, and that’s what matters:

The sound engine (“Cyd”) is basically a very simple software synthesizer with capabilities comparable to the SID or any 8-bit machine from the 80s. The editor is a fairly standard tracker, much like GoatTracker.

The graphics half of the engine is basically a wrapper around a quite fast collision detection system (pixel-accurate, or it wouldn’t be much good for a thrustlike) built on SDL. It also does background collisions and drawing as well. As you may have guessed, the whole point is to provide a limited but still helpful set of routines that are useful for creating 2D games not unlike what video games were in 1991.

And, here’s a proof I’m actually working on the actual game (the sound effects are created in real time by the sound engine):

A note on Google Code: it’s rather nice. It provides the standard open source development stuff like source control an such but I really like how clean and hassle-free it is. Adding a project takes a minute and after that it’s simply coding and some quick documentation on the project wiki. The project wiki is good example of how simple but elegant the system is: the wiki pages actually exists inside the source control as files, just like your source code.

Go check Google Code out and while you’re at it, contribute on my projects. :)

22 Apr

Blog Experiment: Desaturating and resizing images

More from the muse called Referer:.

Resizing images

Resizing an image is an interesting subject. There are many ways to do it and you can also do the same thing in very different methods. Quickly summarized, I’d say resizing an image can be categorized like this:

  • Enlarging
    • Resampling
      • Nearest neighbor (blocky)
      • Linear interpolation (blurry)
      • Spline interpolation (e.g. cubic, lanzcos etc., blurry, sometimes exaggerates contrast and makes edges stand out too much)
    • Super-resolution (“CSI” style zooming)
  • Shrinking
    • Resampling
      • Nearest neighbor (blocky)
      • Linear interpolation (average)
      • Spline interpolation (sometimes better than average, especially when the resolution isn’t for example, halved or divided by three)
    • Re-targeting (“content aware resizing”, keeps important details unchanged)

Now, for usual resizing there are many libraries that do it for you. There is no point recreating the same algorithms over and over, considering you will most likely use either bi-linear interpolation, a spline algorithm or some special algorithm. When using SDL, I have used SDL_gfx to resize images both larger and smaller. It does most basic interpolation, for slight resizing it should be good enough.

Demonstration of the 2xSaI interpolation, with nearest-neighbor scaling on the left for comparison. Another free piece of code for resizing is the Super Eagle algorithm which was specifically created for resizing emulator (Snes9x) graphics larger: it doesn’t blur edges and works quite well removing “jaggy” lines. It should be available for [your preferred graphics library], it has been adapted to so many projects that it is only very probable that there is an implementation floating around for you to steal.

As for commercial implementations of super-resolution, this looks pretty awesome. As does this online bitmap image to vector image converter (vector images do not suffer of the loss of sharpness when enlarged).

Do keep in mind that you can also use the video card of your computer to scale images: most (pretty much all) computers have some 3D features which means they can be used to quickly draw an image on the screen in any dimensions you like, even if you don’t need interactivity. I use this method in Viewer2 and I found it easy to implement. Also, you can shrink images the same way, usually a graphic library will have a function that generates mipmaps which give very nice results when the drawn image is smaller than the original.

And now the reason why I started writing these (lame) blog entries: image re-targeting or seam carving. My implementation works somehow (mainly with cartoon style images with as little color gradients as possible) but there are many other implementations that are good.

Desaturating (greyscaling) images

Desaturating (i.e. making color images black and white) is a subject that interests a portion of the people who find their way on my site. While this is a trivial problem to solve in any programming language, there actually are some quirks to it. Here goes.

This is the easiest (and probably fastest) method:

Grey = (R + G + B) / 3;

However, when speed is not important or if you simply are more pedantic than you are lazy, a more accurate mixing ratio is as follows:

Grey = 0.3 * R + 0.59 * G + 0.11 * B;

This is because the human eye isn’t equally sensitive to all three color components. While those three ratios are the most often quoted, each eye probably needs a slightly tweaked mix. But the main idea is that we are able to see green much better than red, and red a bit better than blue.

Lossy image compression uses this fact to dedicate more bits to the colors to which the eye is more sensitive. Also, back when 24-bit resolutions weren’t quite yet available, the 15 or 16-bit modes often dedicated less bits to the blue component.

Worth noting is that if you want the correct algorithm to be fast, you will probably need to ditch the floating point operations and do the conversion with integers a bit like this:

Grey = (77 * R + 151 * G + 28 * B) / 256;

In any proper language and with a decent compiler, the above should compile to code that doesn’t have a division but a bit shift for speed (2^8 = 256, shifting right by 8 bits is the same as dividing by 256). Though, if you do that, make sure your variables are wide enough so they won’t overflow.

Do keep in mind any modern processor has vector processing capabilities. That is, you desaturate multiple pixels in one operation. And, that in such case it could be possible to do the conversion quite fast with the first formula that uses floating points. Then again, if you are able to use such features, you probably didn’t need to read this.

17 Jul

Nanopond Screensaver

[This is an archive post from my old homepage]

For those who don’t know what Nanopond is: Adam Ierymenko’s Nanopond a minimal (absolutely tiny) artificial life system based on randomly mutating and evolving computer programs that eventually get more and more efficient in copying their program thanks to natural selection. While it does not have as diverse dynamic as Ray’s Tierra but it is more interesting to look at.

See a time-lapse video of evolution in action:

This screensaver is a quick hack of Nanopond that allows it’s use as a Windows screensaver. Does not support passwords or anything fancy but it saves the pond when the saver exits. Delete nanopond.1 in the Windows directory to start over.

The pond size (and the screen resolution) is the standard 640×480, but the pond depth has been set to 64 to minimize the pond state file size (with the default settings it’s around 80 megabytes, now around 20 MB).

Download – Binaries and the source code. Extract nanopond.scr (optimized for Pentium MMX) or nanopond_athlonxp.scr (optimized for AMD Athlon XP) in your Windows directory. You need the SDL libraries.