22 Apr

Blog Experiment: Desaturating and resizing images

More from the muse called Referer:.

Resizing images

Resizing an image is an interesting subject. There are many ways to do it and you can also do the same thing in very different methods. Quickly summarized, I’d say resizing an image can be categorized like this:

  • Enlarging
    • Resampling
      • Nearest neighbor (blocky)
      • Linear interpolation (blurry)
      • Spline interpolation (e.g. cubic, lanzcos etc., blurry, sometimes exaggerates contrast and makes edges stand out too much)
    • Super-resolution (“CSI” style zooming)
  • Shrinking
    • Resampling
      • Nearest neighbor (blocky)
      • Linear interpolation (average)
      • Spline interpolation (sometimes better than average, especially when the resolution isn’t for example, halved or divided by three)
    • Re-targeting (“content aware resizing”, keeps important details unchanged)

Now, for usual resizing there are many libraries that do it for you. There is no point recreating the same algorithms over and over, considering you will most likely use either bi-linear interpolation, a spline algorithm or some special algorithm. When using SDL, I have used SDL_gfx to resize images both larger and smaller. It does most basic interpolation, for slight resizing it should be good enough.

Demonstration of the 2xSaI interpolation, with nearest-neighbor scaling on the left for comparison. Another free piece of code for resizing is the Super Eagle algorithm which was specifically created for resizing emulator (Snes9x) graphics larger: it doesn’t blur edges and works quite well removing “jaggy” lines. It should be available for [your preferred graphics library], it has been adapted to so many projects that it is only very probable that there is an implementation floating around for you to steal.

As for commercial implementations of super-resolution, this looks pretty awesome. As does this online bitmap image to vector image converter (vector images do not suffer of the loss of sharpness when enlarged).

Do keep in mind that you can also use the video card of your computer to scale images: most (pretty much all) computers have some 3D features which means they can be used to quickly draw an image on the screen in any dimensions you like, even if you don’t need interactivity. I use this method in Viewer2 and I found it easy to implement. Also, you can shrink images the same way, usually a graphic library will have a function that generates mipmaps which give very nice results when the drawn image is smaller than the original.

And now the reason why I started writing these (lame) blog entries: image re-targeting or seam carving. My implementation works somehow (mainly with cartoon style images with as little color gradients as possible) but there are many other implementations that are good.

Desaturating (greyscaling) images

Desaturating (i.e. making color images black and white) is a subject that interests a portion of the people who find their way on my site. While this is a trivial problem to solve in any programming language, there actually are some quirks to it. Here goes.

This is the easiest (and probably fastest) method:

Grey = (R + G + B) / 3;

However, when speed is not important or if you simply are more pedantic than you are lazy, a more accurate mixing ratio is as follows:

Grey = 0.3 * R + 0.59 * G + 0.11 * B;

This is because the human eye isn’t equally sensitive to all three color components. While those three ratios are the most often quoted, each eye probably needs a slightly tweaked mix. But the main idea is that we are able to see green much better than red, and red a bit better than blue.

Lossy image compression uses this fact to dedicate more bits to the colors to which the eye is more sensitive. Also, back when 24-bit resolutions weren’t quite yet available, the 15 or 16-bit modes often dedicated less bits to the blue component.

Worth noting is that if you want the correct algorithm to be fast, you will probably need to ditch the floating point operations and do the conversion with integers a bit like this:

Grey = (77 * R + 151 * G + 28 * B) / 256;

In any proper language and with a decent compiler, the above should compile to code that doesn’t have a division but a bit shift for speed (2^8 = 256, shifting right by 8 bits is the same as dividing by 256). Though, if you do that, make sure your variables are wide enough so they won’t overflow.

Do keep in mind any modern processor has vector processing capabilities. That is, you desaturate multiple pixels in one operation. And, that in such case it could be possible to do the conversion quite fast with the first formula that uses floating points. Then again, if you are able to use such features, you probably didn’t need to read this.

28 Mar

Playstation 3 vs. Atari VCS

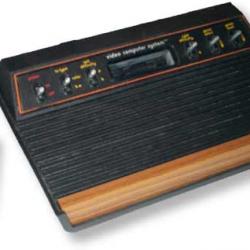
More demoscene stuff: a very recent PS3 demo (a real-time animation for you not in the know) and a very recent Atari VCS demo. The Atari VCS (redubbed Atari 2600) was pretty much the first game console for the masses and it was released in 1977. The Playstation 3 was released in 2006.


Atari VCS

Sony Playstation 3

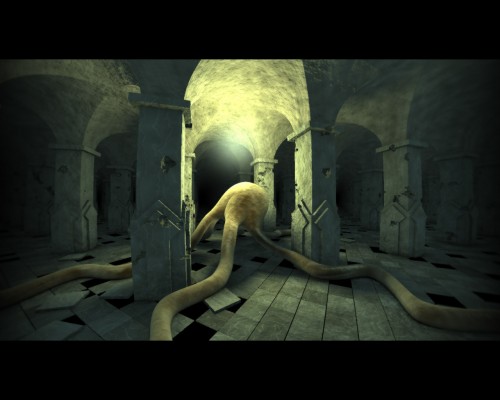
Linger In Shadows by Plastic is the first home brew production I have seen for Playstation 3. You can also download a high quality version of the Youtube video shown below.

Next, a demo (or intro, since most VCS demos are so tiny) by Simon Quernhorst called 4K4U. The author has announced that he’ll be selling cartridges of this later. In the mean time, you can download the rom for your emulator over here. A good VCS emulator would be Stella.

Again, I merely found the videos so a big thank you to the people who saw the trouble uploading the videos (it’s surprisingly hard to find a good screen capture tool as opposed to commercial crud!).

25 Mar

Some Cool Demoscene Stuff

Here are some of my favorite demoscene products with a short review of each.

Matt Current (The Shitfaced Clowns/Breakpoint 2007)

Gameboy Advance

You could say Matt Current features two demos in one. The first part features 3D stuff very familiar to anyone who has seen mid-1990s demos and the second half is a complete change in style with one of the best tracks I have heard in a demo (with lyrics), effects with more focus on the presentation than the technology and hip hop. I love the short flashes of video captured footage of skateboarders in synch with the music and the 2D parallax field of graffiti.

Atrium (TBC & Loonies/Breakpoint 2008)

4KB/PC/Win

There are a lot of very impressive 4K intros that have come out in the last few years but this one caught my attention. It is funny how the pacing — the single most important thing outside the content itself — is much better than of those in many multi-megabyte demos. The growing building effect also is pretty much equal to the 2006 Assembly demo by Fairlight shown below.

The Secret Life of Mr. Black (Orange/Assembly 1997)

PC/DOS

Orange demos have a very distinct style. Even simple things like fade ins and fade outs are tweaked, mainstream effects are avoided (notice the complete lack of Phong shaded polys and other common stuff) and the demo generally has a weird atmosphere (just listen to the soundtrack).

Inside (CNCD/The Gathering 1996)

PC/DOS

CNCD’s Inside has one of my favorite soundtracks, the fat track suits the demo well. While some of the 3D stuff in Inside is a bit out of place (how do you segue from rappers to spaceships is beyond me) and looks dated, the remainder of the effects still look absolutely fantastic.

And now for the best of the bunch…

9 Fingers (Spaceballs/The Party 1993)

Amiga

Take a look at Spaceballs’ 9 Fingers and think about the fact it was done on the Amiga and that it features streaming video of sorts. The demo came on two 800 KB floppies and only lasts for less than three minutes, which was unheard of (well, Spaceballs already did the same with State of the Art but I bet you know what I mean). Ironically, the demo takes far more data when converted to an inferior quality Youtube video.

The captured video footage is converted into a polygon mesh which allows for good compression ratio (you need to store only the mesh points and the polygon color). Of course, the more important thing is that it allows sufficiently fast decoding the video and other effects such as the rotating cube with “texture mapping”. The Atari ST demo shown below employs a similar trick as it streams the precalculated polygon data (or rather the horizontal line data) from disk.

You might also want to take a look at the making of 9 Fingers.

24 Mar

Show Me Yours and I’ll Show You Mine

The level editor for your games, that is. My personal experience of making games is that the behind the scenes tools such as level editors are at least half the work. If you’re lucky, you can use existing tools for creating the data but I guess that is very specific to a genre.

I have found that developing an editor is not only convenient but also allows you to polish the game mechanics a lot better than doing that purely in code. I guess many game developers think level editors and such are only for bigger projects where the programmer is not the guy who makes the levels. It is possible and manageable to create games by hardcoding the level data and object behavior but as mentioned, a proper editor is so much better.

Of course, if you have been smart, you will be able to share the code between the game and the editor. And if you are a bit smarter, you can build the editor inside the game so you have a perfect testing environment for the levels — as long as using dynamic level data is possible in your engine. An extremely good example is the Cube Engine which allows multi-player level editing while playing.

Anyway, the original point of this post is that it can be very hard to imagine what’s a good editor like. Doubly so, if your game idea is different from the average game. I figured it could be helpful for some indie game devs if I show some of my level editors. I hope this inspires people to tell about their development environment.

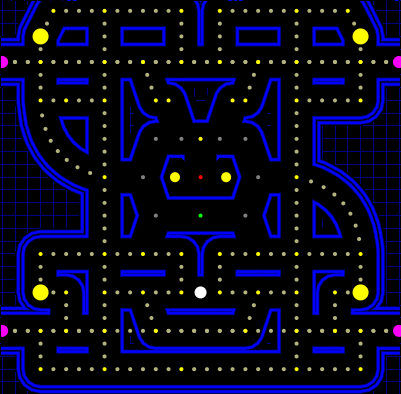
Below is the level editor for my forthcoming Pac-Man clone. I couldn’t use any tile-based map editors, which probably would have been more than sufficient for a tile-based game. Mine uses linked nodes that can be moved freely in 2D space.

The level editor does most of the work: the game only gets a crunched copy of the level data with precalculated splines and so on. Stuff like that makes it possible to keep the level rendering code intact while the editor gets more features. Originally, the editor and the game just did straight lines. When I added the splines to the editor, the game still got a list of straight lines and used the old code.

The game and the editor are both made using SDL and OpenGL. Using SDL means you have to reinvent the wheel a bit when it comes to GUI stuff but it is manageable. If you can figure out how to implement dragging with the mouse (SDL only provided events for mouse clicks, releases and motion), you are able to create a GUI that will be good enough for your project.

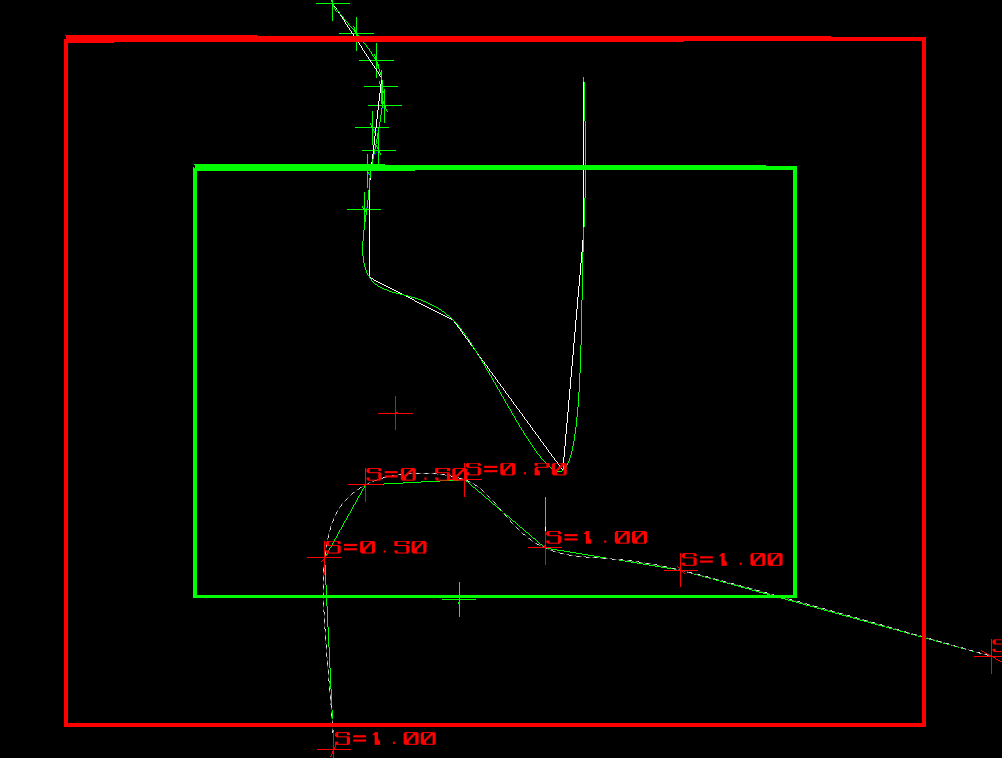
This is a level editor for an untitled shmup project of mine. All the attack wave movement is defined by Catmull-Rom splines (unless the object is of special type, e.g. a homing missile).

The editor imports all the object classes thus it is trivial to display the graphic for an object. The editor then exports the level data as C++ code by subclassing the level class and automatically writing code for events like “spawn object type Enemy when camera enters this node”.

The editor allows the user to “rewind” and “play” the level while editing. When F5 is pressed, the camera starts following the camera movement spline from the currently selected node and enemies move along their own paths. This is only an approximation since no AI code is available in the editor. That means you can only see spline based movement. It nonetheless makes it much nicer to plan attack waves.

The intermediate game level data for both editors is stored as an XML document. Most game data is representable as a tree, so XML is a natural choice for it. As recommended in an earlier post, xmlParser is an excellent choice for a quick way to save your level data. Do not fear XML because of how clunky it can be from the perspective of a programmer — the mentioned library pretty much removes most of the friction. And, you can always write an XML to converter afterwards.

Condensing, here’s what I have learned:

  • Writing an editor can be a lot of work but you can make it fun and it will pay off in the end
  • Use existing frameworks
    • for displaying the game data in the editor
    • for saving the editor data
  • If at all possible, allow gameplay inside the editor

So, what do your editors look like? What have you learned about game development and how editors can make it more fun?

22 Mar

Amazing 4KB Ray Tracer

2008-07-27T12:24:18+00:00: Updated with an even more impressive 4 KB raytracer from RGBA1


Slisesix

The above is the output of a 4KB intro by Rgba that uses purely generated data to render a nice creepy landscape scene. To give some perspective: the same image compressed into a JPEG of similar size would look crap. And it still needs code for displaying the compressed image. You can try and run the program yourself, it can be downloaded from the Rgba site (32-bit Windows binary)2. It takes about 10 seconds for the image to appear on my Athlon XP 3000+. Let’s hope they will make a screen saver of it, with random parameters for the scene.

Things like this make me think of how much things have gone forward since I first looked into ray tracing. It used to take many hours for a similar image to render in POV-Ray (not including the time used for modelling!). Nowadays, you can optimize for size (as opposed to optimizing for speed) and still have a reasonably fast ray tracer. It’s not too far fetched that the above landscape could be rendered real-time on a fast processor and probably with some speed optimizations.