22 Feb

Generating game content

Part 2 of this series »

If you can’t draw graphics or create sounds for your games, here are a few interesting tools I came across recently that can help you.

sfxr

sfxr generates random sound effects such as explosions, sounds for jumping and so on. The sounds are nice and crisp and you can easily tweak a randomly generated sound to suit your needs better. A nice feature is that you can click on sound types to generate a sound for common actions in games.

Pixel Robots & Invader Fractal

Pixel Robots generates random sprites that resemble robots (well, duh). It’s a Java applet (made with Processing) so you can (or, have to) run it in your web browser. Hence, it is not too convenient to use for pure sprite generation purposes – but it is quite nice eye candy.

The author mentions the Invader Fractal as his inspiration. It is a quite similar thing, in that it generates a sheet of tiny sprites and runs in browser (it’s a Flash applet).

Both generators are quite nice in that their authors give good insight how the programs generate the sprites.

Richard’s Evolving Sprite Tool

I saved the best for last. Richard’s Evolving Sprite Tool, as the name implies, evolves sprites. The main idea is that the program generates a grid of mutated sprites and you can choose the one that looks good. The selected sprite then spawns mutated offspring. This continues until you decide the sprite is good enough. On the left, there’s an example of an evolved and hand-colored sprite (grabbed from the Retro Remakes forum thread).

It is also much more of a tool than the two previous generators, the user can edit the sprites inside the program. After the user has edited a sprite, it can be evolved further. Very nice if you’re short on inspiration.

Next thing Richard needs to do is to add a way to colorize and animate the lovely sprites.

kometbombNote: Since this tool has gone AWOL, here’s something similar: Retro Avatar generator. For example, the avatar created from my name looks like what you see on the left (cute!).

21 Feb

Awesome games that are also free

Here is yet another list of free games considered awesome by the majority of this blog’s writers (me). As you can see, my taste in games is quite retro.

Cave Story (D?kutsu monogatari, ????)

Note: The author of Cave Story has requested people to stop distributing the game, this is because is is to be expected to be available on WiiWare (I hope the game will not be exclusive to Wii gamers). Here’s one such rumor.

Try if you like: Megaman 2, Metroid – any good NES game that defined your childhood

Here is a game that is on every free games list and for a reason. Cave Story feels and looks like a NES game that was updated for a SNES release. The graphics are simple and sometimes blocky – but intentionally so. Similarly, the music is something you would hear in a NES game. In a good NES game. I still find myself humming the catchy tunes even though I finished the game a while ago.

The basic game is about making a little guy run, jump and shoot. There are a variety of weapons, some weapon choices even alter the game story. There even is simple leveling up, some enemies drop crystals that make your current weapon more powerful.

Best of all, there clearly has been huge effort in making the game more than a retro run-and-gun game. There actually is a good, long story about cute creatures that need your help. The levels are huge and varied: there even is a side-scrolling level. Another level twists the standard game mechanics as you need to negotiate a flooded area with vortices that usually pull you into unsurprisingly lethal spikes.

There also are memorable boss fights including one with a boss larger than the screen. Now that I mentioned it, the game is simply memorable. There are too many things to tell about this game. Too bad the game is free because it clearly is worth money.
The game is available at least for PC, Mac and GP2X.

Rated: Awesome+

OpenTTD

Try if you like: SimCity and other building games, trains in general

Transport Tycoon probably is the game that I have spent the most time with, ever. It’s basically about tiny trains hauling things from A to B, then hauling things from B to C.

Sounds boring. Why is it so awesome?

Because there is a ton of things to try to make your transport empire make more money. You could build a simple track from place A to B and then another track from C to D. But if you’re smart, you’ll build a whole railway system and connect satellite stations to it – just like it is done in the real world. Then, to make trains smarter, you’ll add signals, build more efficient stations and update your old routes to monorails and so on.

I think the defining factor that makes OpenTTD so fun is that it is actually you who builds all these things. For example, in some other simple game you could select between a few station types – each with their own cost and efficiency. In OpenTTD, you have exactly one station type. What makes a station efficient is how you connect the rails to it, how many platforms it has and do slower trains clog up the whole system. To give some perspective, here is the game manual on stations.

There also are airplanes, ships and trucks but they’re rubbish.

OpenTTD is ported on many systems as it is open source. There even is a Nintendo DS port.

Rated: TOOT TOOT

The Ur-Quan Masters (aka. Star Control 2)

Try if you like: Any scifi game

Star Control 2 is probably one of the most loved games from the early 1990s. It combines exactly right amounts of adventure, action, exploration and humor. The game is about you, the spaceship captain, trying to free Earth and the known universe from the Ur-Quan (tentacled slavemasters).

The gameplay consists of a top-down view of your ship. The ship is controlled by rotating and thrusting – nothing new since Spacewar or Asteroids. The controls remain the same whether the ship was in hyperspace, traveling for hundreds of light years, and during close encounters with enemies, i.e. dogfighting to death while orbiting a planet.

When your ship is in hyperspace, you can travel between stars. Every star has planets orbiting it, most of the game features you launching an exploratory ship down on the planets and collecting minerals and biological samples. The things you find act as money: at Earth you can trade minerals and other stuff to fuel, technology, crew and fighters. The biological samples can be traded for new technology when you come across a certain alien race.

Some stars are the homeworlds of alien races – some friendly, some less friendly. When meeting an alien, you will converse with them using different bits of dialogue, similarly to most adventure games in general. You will often get information where to find more alien races and sometimes you’ll get a quest to complete. Sometimes, you’ll be able to avoid battles if you are smart when conversing with the aliens. It is during these encounters you will get the most laughs.

The presentation is nothing short of awesome. Every race you meet has its own theme music, animated graphics, voice acting and even font for the captions.

Rated: AWESOME-666

20 Feb

Let’s make a planet

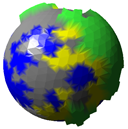
For the last few days, I have been working on a planet generator. I originally got the idea from the method how you can easily tessellate sphere into triangles. This results in a spherical map instead of a cylindrical map.

The usual way of rendering a planet as a a sphere with cylindrical texture map (or height field) looks quite bad in places because the map is stretched on the equator and pinched near the poles. The method described below takes a different approach and generates a map of vertices connected by triangles.

The vertices contain the terrain information such as terrain type (sea, land, mountain) and height. More detail is introduced by subdividing the triangles into smaller triangles.

The starting shape is an octahedron. We then subdivide each side into four triangles, normalize the new vertices and apply simple physics to move all the vertices away from the others (reverse gravity) – this eventually settles the vertices quite evenly (it won’t be a perfect shape but it is good enough for most purposes). We don’t even need to start from a symmetrical shape, using a naive repulsion algorithm eventually makes the shape symmetric as long as it is possible.

The number of subdivisions can be variable and dynamic. I’m planning to make the generator subdivide triangles on demand. In a game, you would see approximate shapes from the orbit but when flying close to the surface, the shorelines etc. would have a lot more detail. You can subdivide infinitely which means there will be infinite detail.

Dragon curve

I use a very simple algorithm to decide the terrain type on each vertex, simply the first point of the triangle decides the terrain type on the new triangle. This results into the Dragon curve fractal. A more sophisticated algorithm would change the subdivision rules according to the subdivision depth. For example, the same rules shouldn’t apply when subdividing on a continental scale versus to a scale of a few kilometers.

Next, I’m going to model a very simple simulation of atmosphere including prevailing winds, cloud formation and temperature.

Links

18 Feb

A simple statistics plugin for WordPress

Here’s a very simple plugin for WordPress that keeps track of view counts of individual pages. It is not intended to be a complete statistics solution. Rather, the main purpose is to provide something for those empty spots in your site layout.

Here is a sample graph (page views for this site):

For a better example, see the site stats page.

Features

  • Keeps day-by-day based page view stats using the database
  • Outputs a clean histogram
  • Includes easy functions for those who are better at blogging than programming

Installation

Copy viewcount.php in /wp-content/plugins and enable it in WordPress options. Enter the path of the directory you want to the graph cache to be located in the options page (Options > Viewcount). The plugin will then start counting page views.

Note: the plugin taps into the_content(). Pages that do not use it will not update the stats! See below for a workaround.

Usage

To display statistics, there are a few functions.

get_view_histogram($page=-1,
  $days=60,
  $barwidth=10,
  $barheight=16,
  $barspacing=1,
  $barcolor='#000000',
  $backgroundcolor='#ffffff',
  $web20=16)

get_view_histogram() returns a URL to a PNG image.

If $page is unset or is -1, the data will be the combined page views for all pages. $web20 specifies the height of a “Web 2.0” style reflection under the bars. The rest of the parameters should be easy enough to figure out.

You can use the function like this to display the statistics for the current post (or page):

<img src="<?php echo get_view_histogram($post->ID); ?>" />

You can also display a top list of page views with get_view_count_list().

get_view_count_list($limit=10,
  $days=30,
  $before='<li>',
  $after='</li>',
  $excludeid='',
  $type='')

$excludeid is a comma-separated list of post IDs (note:the list is not escaped so do not use any values in there that come straight off $_GET or so!). $type is either “post” or “page”, empty string returns both.

You can exclude the page that is currently viewed like this (shows the top five pages from the last 30 days excluding post ID $post->ID):

get_view_count_list(5,30,'<li>','</li>',$post->ID);

To display a Popularity Contest style percentage (the percentage of traffic a post has compared to other posts), use get_popularity($page=-1,$days=30,$format=’percent’). if $page equals to -1, the current page ID will be used automatically. $format can be either ‘percent‘ or ‘float‘ — ‘percent‘ returns a string with the percent sign, ‘float‘ returns a floating point number between 0.0 and 1.0. The following will display a percentage of page views for the current page during the last 30 days.

<?php echo get_popularity(); ?>

To display all time statistics, you can simply do this:

<?php echo get_popularity(-1,99999); ?>

This will display all time statistics, unless your blog has been online for more than 274 years.

To get the list of most viewed pages, use the function get_top_pages($days=30,$limit=10,$type=’views’). $type is either ‘views’ or ‘popularity’.

You can request more functions!

Download

viewcount.zip

Notes

You need the GD library installed for PHP.

I created the plugin to see how that is done. Therefore, crap code ensues (see the warning about excluding posts above).

The plugin will count views for pages and single posts only. Page views from users who are logged in (e.g. you) will not be logged.

The plugin taps into the_content() to count views. You can use vc_update_counter($id) to manually update the page views (or, you can be creative and count very different stuff with it – just make sure the ID is not in use by real pages).

In case you think the graph is wrong: the bar height is normalized. This is just so there is interesting variation in the height.

15 Feb

Customizable page layouts

I recently redesigned my site running on WordPress, which gave me some ideas about a bit more convenient layouts. I hope they are of some value to anyone who is designing their own layouts.

I wanted to tackle a common problem: on a modern (1280+ pixels wide) screen resolution it is often hard to read because the text rows are simply too long.

The easiest way to limit text width layout-wise would of course be to create a fixed-width layout. However, some viewers probably would like to have as wide text as the screen allows. Using some Javascript and DHTML magic, it is easy to make the fixed-width layout resizable. The site can even keep the same width across different pages if it is stored in a cookie.

In Javascript, you can easily change an element’s properties, here is how you would change the width of an element with the ID ‘resizable‘:

document.getElementById('resizable').style.width="500px";

Values can be saved in a cookie as follows (using / as the path sets the cookie for all pages under the domain, important if you want to keep the same width across different pages, cookie expires after days days):

var expire = new Date();
expire.setTime(expire.getTime() + 1000*60*60*24*days);
document.cookie = cookieName+"="+escape(cookieValue)+
  ";expires="+expire.toGMTString()+";path=/";

It is suboptimal to resize the layout after it loads, this will result in an annoying redraw of the page after a few moments. Using some server-side scripting, you can inject the width from the cookie so the page renders at the desired width from the beginning. On my page it is done like this:

<div style="width: <?php echo $_COOKIES[page_width]; ?>">

Probably the most technical thing when implementing the resizing is handling mouse drag in Javascript. On my page, I check if a mouse click happens on an element that has a class name of “drag” and if it is, the drag begins. If the mouse button is released, the drag ends and the resized width is calculated.

var dragging=false;
var start_x=0;

function mousedown(e) {
  if (e.target.className=="drag") {
    start_x=e.clientX;
    dragging=true;
  }
}

function mouseup(e) {
  if (dragging) {
    dragging=false;
    end_x=e.clientX;
    move_x=end_x-start_x;
    // drag ends, we moved move_x pixels
  }
}

After we know how much the X position changed, we can adjust the element width. The following code extracts the number part from the width, adds the X movement to it and again adds the ‘px’ unit in the end:

d=document.getElementById('postcolumn');
m=d.style.width.match(/(\d+)px$/i);
d.style.width=move_x+Math.round(m[1])+'px';

The element width should change by the same amount the user dragged the mouse. At this point you might want to set the cookie as described above.

That’s about it! I am quite sure someone who has no experience of doing things in Javascript and CSS doesn’t get much from the above. I intented this post to be a heads-up of sorts, this is quite easy to implement and in my opinion can be quite convenient. You can try it by dragging the right edge of this post.

If you really want to have that on your site but can’t figure out it by yourself, leave a comment and I’ll help as much as I can. Also, you can look at the source code of this page to see how I did it.

Links