Seen – Monitor bot activity on your WordPress blog
 Seen is a WordPress plugin that shows when and which bots visit your blog. This can be useful to see if a page ever gets visited by bots (so you can adjust robots.txt or so) or simply to amuse yourself if you are obsessed with what is happening with your blog (everyone knows you are).
Additionally, you can get a better understanding of how fast a page gets indexed by search engines and how fast it gets reindexed after you have modified the page. I found it interesting to note what’s the general strategy of different bots, now I know Yahoo really keeps visiting the pages and GoogleBot just very rarely visits older pages (but indexes new pages really quickly).
The plugin uses some simple heuristics to decide if a visiting user agent is a bot and puts it in a list of suspected bots (along with data of which pages it visited and when). You can then remove all the user agents that are not bots. Basically, This means you don’t need to manually add any bots at all, you simply weed out the false alerts. Of course, you can explicitly specify bots by their user agent string or host address.
Installing and using Seen
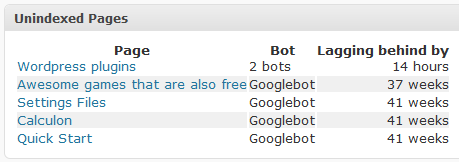
 After installing the plugin (extract the zip file in wp-content/plugins/ and activate the plugin) data will be automatically recorded. You can monitor what is happening directly from on the Dashboard (there will be two new widgets, a list of bots on the watchlist and a list of unindexed pages). Also, if you go to Dashboard > Seen you can see more detailed lists and also the suspected bots list. I think it’s all quite self-explaining. Hint: you can click the star to add bots to the watchlist — clicking the yellow star will remove them.
In the options you can combine bots (i.e. when two or more entries have a differing user agent string but really are the same bot), delete them and edit them. The different categories are there so you can e.g. put Technorati bot in “Search engine (blogs)” which makes Seen not care if the bot has seen the latest comments. You can also categorize bots as “Browser” which means their data will be hidden as it probably won’t interest you.
Seen 0.5.1 (Supports WP 2.7 thru 2.8)
What’s new in 0.5.1
See comment #2 below.
Note: This is not yet 1.0 quality but it should work OK. By downloading and installing the plugin, you acknowledge no responsibility lays on the plugin author.
